
help center
Quick Start Guide: From Zero to Your First Quote
Set up company branding & details
- Upload your logo
- Add your company locations
- Customize the header and footer for quotes and invoices
- Add your company contact details

Create your user roles
- Click Add role and name it (e.g. Installer, Project Manager)
- Select the system permissions for that role
- Repeat for each role you need

Add your team — desktop & field
- Add each desktop user (office) and field user (mobile app)
- Assign each person a role from Step 2

Add or import companies
- Add manually, or import your whole list at once from Settings › System › Data Import
- Then add the contacts — the people at each company

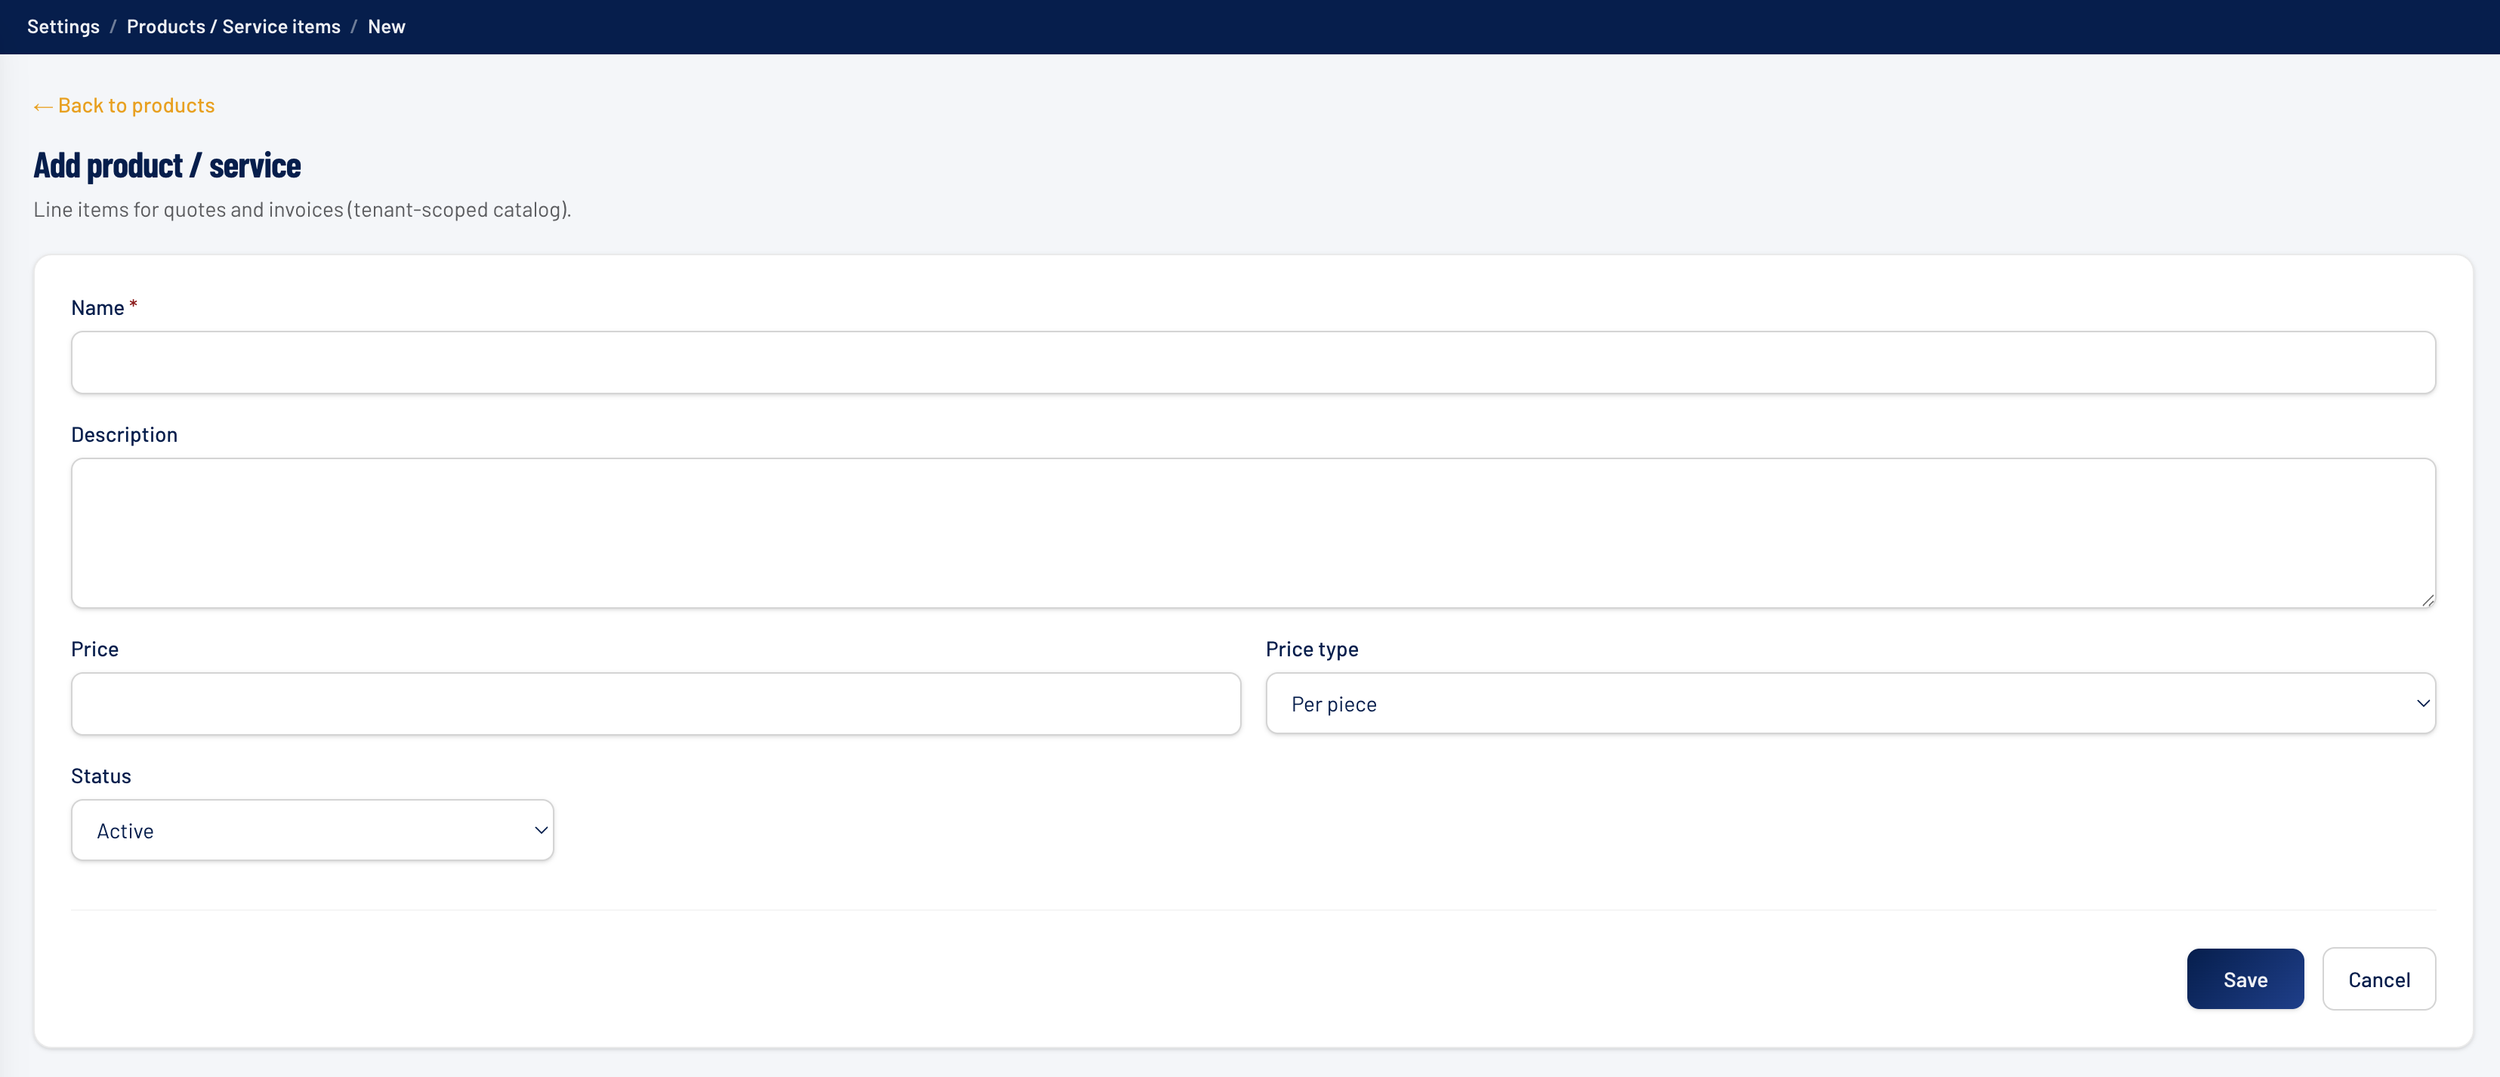
Add products & services
- Add at least one product or service item — required to build a quote
- Add your common line items, units, and pricing
Build and send your first quote
- Click New Quote and select the company
- Add line items and set quantities
- Change status Working → Sent, then click Open in Email

Your Dashboard
Set your revenue goals first
Two goals drive the top of the Dashboard:
- Quoting goal — how much work you want to quote
- Booked goal — how much you want to actually win
Set them and the Dashboard tracks your progress on its own. Until you do, the percentages won't mean anything.
How the numbers get counted
- Quotes sent — a quote counts the moment you mark it Sent
- Projects booked — counts when you create a project or convert a quote into one
Both show the total and your percentage of goal, with a trend line across the period.
Goal vs Actual
The Projects Booked: Goal vs Actual chart puts your booked value against your goal month by month for the year.
Read it for shape, not for any one month. A run of months under goal is a pipeline problem you can still do something about. One bad month usually isn't anything.
Your To Do List
This shows every to-do assigned to you, pulled from every project, so you don't have to open ten jobs to find out what's waiting on you. Overdue items are marked.
- Add a to-do straight from here when it doesn't belong to a particular job
- Mark items complete from here too
- Filter with My Tasks and Completed To Do
To-dos added inside a project stay attached to that project and still appear here for whoever they're assigned to.
Scheduled
Everyone actively scheduled for that day, with the date and time.
Who's Working
Everyone actively clocked in right now and the project they're on.
Read the two together and you've got your morning check. Scheduled tells you who should be working. Who's Working tells you who actually is. The gap between them is the call you need to make.
Adding something new
The + Add new button at the top of the menu creates a contact, company, quote, project, or invoice from anywhere in the app.
Company Branding & Details
Upload your logo
- Upload your company logo
Add your company locations
- Add each of your company's locations
Customize your quote & invoice header and footer
These are free text areas. Put whatever you want in them, and it prints on every quote and invoice.
Worth putting there:
- Payment terms — net 30, deposit required, late fees
- How to pay you — check remit-to address, ACH details
- Anything you'd otherwise retype on every job
Add your company contact details
- Add your phone, email, and any other contact info you want customers to see
User Roles & Permissions
Know the two user types first
Every person you add is either a desktop user (office) or a field user (mobile app). This is what your plan's seat count is based on — desktop seats are limited by your tier, field seats are unlimited on Growth and Enterprise plans. Desktop access is set on the employee record, not the role — a role only controls permissions. You'll see a Desktop access checkbox on each employee, and it's only available if your account still has open desktop seats on your current plan.
What lives on the employee record
The role sets what a person can do in each module. The employee record holds everything about the person, including several access switches the role doesn't control:
- Role — their permission set
- Location — which office they work out of, if you run more than one
- Desktop access — only available while you have open desktop seats
- Mobile app access
- See work orders
- See the full schedule — rather than only their own jobs
- Lead — marks them as a crew leader
- Pay rate — what the Summary Report multiplies their hours by
- Photo and shirt size
Create a role
- Click Add Role
- Name it something your team will recognize — Installer, Crew Leader, Project Manager, Office Admin, Owner
Choose what the role can access
Permissions are set by module — Dashboard, Quotes, Projects, Contacts, Companies, Timesheets, Calendar, Employee, Admin, Others, Finance, Blogs, and Mobile. Some modules, like Dashboard, break down further into sub-items (To Do List, Who Working, Notifications, Graphs & Analytics) that you can set separately.
For each module, check off the actions the role is allowed to do: View, Add, Edit, Delete, or All (grants all four at once). A few modules, like Others, are view-only.
- Check individual boxes to build a custom permission set module by module
- Or use Select all at the top of a column (View, Add, Edit, Delete, or All) to grant that action across every module at once
Decide who gets project complete emails
On the role there's a receive project emails checkbox. Anyone with a role that has it ticked gets the email when a job is marked complete and sent for final invoicing.
Tick it on the role that does your billing — an Admin, Finance, or Office role.
Assign the role to a person
- Pick the role you created for that person
Update a role later
Go back to Manage User Roles, open the role, and change its permissions. Changes apply right away to everyone assigned to that role — you can edit a role's permissions anytime, no need to create a new one.
Employee / Contractor
Set up roles first
You can't add a person without giving them a role, so build your roles before you start adding people. Installer, Crew Leader, Project Manager, Office Admin, Owner.
Add a person
Your super admin adds each person. Nobody signs themselves up.
- Their name and contact details
- Role — their permissions
- Location — which office, if you run more than one
- Pay rate
- Photo and shirt size
Set what they can reach
Four switches on the employee record, separate from their role:
- Desktop access — office use, limited by the seats on your plan
- Mobile app access — the field app
- See work orders
- See the full schedule — rather than only their own jobs
There's also a Lead checkbox marking someone as a crew leader.
Two fields that quietly matter
- Pay rate — the Summary Report multiplies hours by this. Miss it and that person's pay comes out wrong or blank.
- See the full schedule — without it, a crew leader moved to another site can't find that job to clock into.
Neither one announces itself. You find out weeks later, at payroll.
Managing people over time
Open anyone's record from the Employee / Contractor list to update their details, change their role, or adjust their access.
When someone leaves, deactivate them. Their record and their history stay put, and they lose access.
If you need the desktop seat back for a replacement hire, deleting the employee frees it up.
Products & Services + Tax Setup
Decide how you're managing your catalog
- Not syncing with QuickBooks Online? Build your products, services, and tax rates directly in Fieldworks Pro.
- Syncing with QuickBooks Online? Connect the integration and your products, services, and tax rates import automatically — no need to enter them twice.
Not using QuickBooks? Add products & services manually
- Add at least one product or service item — required to build a quote
- Give each one a name and a price
Items hold the same information QuickBooks products and services do, so the two line up whenever you connect them.
Not using QuickBooks? Set your tax rates
- Add your tax rates and agencies before quoting anything taxable
Using QuickBooks? Connect it instead
Connect QuickBooks Online under Integrations and your product/service catalog and tax rates import from there — you won't need to rebuild them in Fieldworks Pro.
Integrations: QuickBooks & Google
Connect QuickBooks Online
- Click Connect next to QuickBooks Online and log in to your QBO account to authorize the connection
Connect Google Drive
- Click Connect next to Google and sign in to authorize the connection
This connects Google Drive so you can pull files into a project's Files / Forms tab — drawings, contracts, specs, whatever you already keep in Drive. You can still upload straight from your computer either way. It's also what the Estimator uses to connect your quoting template.
Adding & Importing Companies
Know the difference between a company and a contact
A company is the business you're billing — the dealership, the GC, the end user. A contact is a person at that company. One company can have several contacts: the person who approves the quote, the person who signs for delivery, the facilities manager who meets your crew at the door.
You quote and invoice the company. You put contacts on the project so your crew knows who to call.
Add a company by hand
You can also get there from Contacts / Companies › Companies.
Only two fields are required:
- Company name — this is what prints on quotes and invoices
- Phone number
Fill in the billing and shipping addresses too. You'll want them on invoices, and adding them now is faster than chasing them later.
Import your whole list at once
Importing is done from Settings, not from the Contacts / Companies screen. You can import companies and contacts — those two only.
- Go to Settings › System › Data Import
- Choose whether you're importing companies or contacts
- Download the import template and fill it in, one record per row
- Upload your file — CSV or Excel
Add contacts to a company
Four fields are required:
- First name and last name
- Company — who they work for
Then fill in what's useful:
- Role — what they do, so your team knows who they're calling
- Birthday — day and month
- Billing address and shipping address
Add everyone your crew or your office might need to reach — the AP contact for invoices, the site contact for the day of install, the dealer rep on the order.
The Contacts list shows the company each person belongs to, so you can find someone without remembering who you filed them under.
Deleting a contact doesn't affect their projects. The projects stay; the contact simply comes up empty on them.
Use those contacts on a project
On a project's Overview tab there's a Contacts panel. Each row has a role (Onsite Contact, Other Contact), a name, a phone, and an email.
- Click Select from database to pull a saved contact in — name, phone, and email fill themselves
- Or type a name straight into the row for a one-off, like the electrical sub on that one job
- Click + Add Contact to add another row
Keep the list clean
- Update a company's info on the company record and it carries to new quotes and projects
- Delete duplicates as soon as you spot them — companies can be deleted outright
Deleting a company doesn't delete its work. Quotes and projects stay in the system and simply show company deleted next to them, so nothing disappears on you.
Managing Contacts When Synced to QuickBooks
Same record, different name
What Fieldworks Pro calls a Company, QuickBooks calls a Customer. Same record, two labels. When you see "Customer" in QuickBooks, that's your Fieldworks Pro company.
Once QuickBooks Online is connected, those records exist in both places. Your products, services, and tax rates come across too. You stop keeping two lists by hand.
Where to add a new company
Add it in one system and let the sync handle the other. Pick whichever fits how your office runs and stick with it:
- Add in Fieldworks Pro if your sales side starts the relationship — the record shows up in QuickBooks as a customer
- Add in QuickBooks if your bookkeeper sets up every new account — the record shows up in Fieldworks Pro as a company
What syncs and what doesn't
Company-level billing information is shared. Project-level detail stays in Fieldworks Pro.
- Shared with QuickBooks: company name, billing address, main phone and email
- Fieldworks Pro only: project contacts and their roles, site contacts, jobsite notes
QuickBooks doesn't need to know who meets your crew at the loading dock. That stays on the project.
Before you connect: match your names first
If you already have records in both systems, the sync matches them on name. Names that don't match exactly become second records.
- Pull your customer list out of QuickBooks
- Compare it to your Fieldworks Pro company list
- Fix the spelling, punctuation, and abbreviations so they match before you connect
Fixing a duplicate
- Decide which record you're keeping — usually the one with the invoice history in QuickBooks
- Open each affected quote or project and change the company to the record you're keeping
- Delete the extra record
Changing the company doesn't touch the line items. The pricing and the work stay exactly as they were, only the company on the record changes.
Building & Sending a Quote
Before you start
Two things have to exist first:
- The company you're quoting
- At least one product or service item
If you tax your work, set your tax rates before you build a taxable quote.
Start a new quote
- Click New Quote
- Select the company you're quoting
- Pick the contact who's receiving it
The quote number is assigned automatically, the same as project job numbers.
Add your line items
- Add each product or service item from your catalog
- Set the quantity and unit
- Adjust the price on the line if this job is priced differently
Break the work out the way you want the customer to read it. Install labor, delivery, staging, and disposal as their own lines makes a quote easier to approve than one lump sum.
Every line has to come from your products and services list. You can't type a one-off line that isn't in the catalog.
Check the totals
- Confirm the subtotal, tax, and total
- Confirm the header and footer text pulled from your branding settings
Send it
- Change the status from Working to Sent
- Click Open in Email
This opens your own email program — whatever is set as the default on your computer — with the quote ready to go. You add a line and send it from your own address.
Track where it stands
Move the quote's status as the job moves. There are five:
- Working — you're still building it
- Sent — it's with the customer
- Won — accepted
- Lost — you didn't get it
- Expired — it aged out without an answer
When the customer accepts, click Convert to Project — see Converting a Won Quote into a Project.
Using the Estimator (Google Sheets Quoting)
What the Estimator actually is
Most installation companies already have a spreadsheet they trust for pricing a job — labor, delivery, materials, markup, whatever formulas the business runs on. The Estimator lets you keep using that exact spreadsheet instead of re-creating your pricing logic inside Fieldworks Pro.
Your spreadsheet lives in a Google Drive folder connected to your Fieldworks Pro account. Fieldworks Pro treats that file as your master template.
Connect your template
- Connect your Google account if you haven't already — see Integrations
- Put your quoting spreadsheet in the Google Drive folder linked to Fieldworks Pro
- Link that file to Fieldworks Pro as your Estimator template
Add an estimator to a quote
- Click Add Estimator
Fieldworks Pro goes to your Google Drive and creates a fresh duplicate of your template — a brand new workbook, just for this quote. Nothing from an old quote carries into it, and nothing you do in it touches your master template.
Price the job in the spreadsheet
Work the numbers the way you always have — your own formulas, your own layout, your own categories for labor, delivery, materials, and markup. This is where you figure out what to charge.
Once you're happy with the pricing, that becomes what you quote the customer on the actual quote in Fieldworks Pro, where it can be sent, tracked, and turned into a project.
Update your pricing without touching old quotes
Your pricing changes over time — a labor rate goes up, you add a service, a formula needs fixing. When it does, open your original template file in Google Drive and make the change there.
- Edit the master template in Google Drive
- Every new estimator you create from that point forward includes the update
Why this is worth using
You're not stuck re-entering your pricing logic as generic line items — you get a real spreadsheet to run your math in, the same way you already price a job. And you don't have to choose between using your own numbers and keeping them organized by quote: every quote gets a clean copy, and your master stays the one place you go to change how you price.
Converting a Won Quote into a Project
Click Convert to Project
That's the whole step. One button. The project is created from the quote and you're ready to work.
What carries over
- The company and its contacts
- The line items and quoted amounts
- The contract value, which becomes the project's total to invoice against
Nothing gets retyped, so nothing gets mistyped.
The jobsite address does not come across — it isn't collected at the quoting stage. You add it on the project.
Fill in the project details
The project gets its job number automatically — you don't assign one. The quote gives you the money. You add the job detail:
- Customer PO
- Jobsite address — type this in, it isn't captured on the quote
- Contacts and their roles — who your crew calls at the site
- Stage — where the job sits in your pipeline (see Setting Up Stages & Flags)
Set your budget
Your quoted lines come in as the project budget. From there you can:
- Click Import from Quote to pull the quoted lines in
- Click + Add Line Item for anything the quote didn't cover
- Edit a line's cost if what you'll actually pay differs from what you quoted
Build the scope
Once the project exists, break the work into phases on the Work Order tab. See Managing an Active Project.
Starting a project without a quote
You don't have to quote first. Click + Add new and choose Project — the same menu creates contacts, companies, quotes, and invoices.
Setting Up Stages & Flags
Stages vs. flags
- A stage is where a project is in your process. Every project sits in exactly one, and it moves along as the job progresses.
- A flag is something true about a project right now — Deposit Required, Product On Backorder, Rush. A project can carry a flag at any stage.
Stages answer "where is this job." Flags answer "what do I need to know about it."
Set up your stages
- Click Add stage
- Give it a label and pick a color
- Repeat until the stages match your process end to end
You can reorder and delete stages later. If projects are sitting in a stage you're deleting, you'll be asked to reassign them to another stage first — nothing gets orphaned.
A starting point
If you're not sure where to begin, this covers most installation work:
- Quoted — sold, not started
- Awaiting Product — ordered, waiting on the manufacturer
- Ready to Schedule — product received, needs a date
- Scheduled — on the calendar
- Installing — crew is on site
- Punch — done except for open items
- Ready to Invoice — complete, needs final billing
- Closed
Change it to fit. The point is that a glance at the board tells you what's stuck and where.
There's no limit on how many stages you can create, but that's not a reason to add more. Too many and you spend your time managing statuses instead of jobs. Build what makes sense for how you actually work.
Work the board
Your stages become the columns on the active project board, so you can see every job in your shop at once.
There are two ways to look at it:
- Board view — projects as cards in stage columns
- List view — the same projects in rows
Use the board when you want to see where work is piling up. Use the list when you're looking for one specific job.
Set up your flags
Create a flag for anything that should make a project jump out at you:
- Deposit Required
- Product On Backorder
- Rush
- COI Needed
- Union Site
Give each flag a color when you create it, the same way you do with stages. A project can carry more than one flag at a time — a job can be both Rush and waiting on a deposit.
Put a flag on a project
Two places, whichever you're already in:
- Click the project card and pick from the dropdown
- Or set it on the project's Overview page
Use flags to sort
Flagged projects stand out on the overview, and you can sort by flag to pull up everything that shares one — every job waiting on a deposit, in a single list.
That's the real value. A flag isn't decoration, it's a to-do list you can filter.
Managing an Active Project (Scope & Daily Logs)
Know your tabs
Every project opens with the same set of tabs:
- Overview — project details, contacts, internal notes, to-do list, activity feed
- Finance — contract value, budget lines, invoices
- Work Order — jobsite address, equipment, scope of work phases
- Daily Logs — what the crew did each day, with photos
- Schedule — who's on this job, which days
- Files / Forms — contracts, drawings, permits, photos
- Product Tracker — receiving and delivery
- Reporting — cost entries and labor costing for this job
Set up the Overview
This is the top of the job. Fill it in once and the rest of the project pulls from it.
- Project Details — job number, customer PO, jobsite address, stage
- Contacts — who your crew calls, by role
- Internal Notes — the stuff your office needs and the customer never sees
- To Do — loose ends that aren't a scope phase, each with a due date and an assignee
- Activity Feed — an automatic record of every change made to the job
Nobody posts to the Activity Feed. It logs itself whenever anyone touches the project, so an owner or project manager can see what happened last without asking around.
You can also add a to-do straight from the Dashboard when it doesn't belong to any one job. Anything you add here on the project stays tied to this project.
To-dos are a desktop tool, for the office side of the job.
Build the scope of work
Break the job into phases. Each phase is a chunk of work with dates on it.
- Click + Add Scope Entry
- Give it a phase name — Delivery & Staging, Systems Install, Casegoods, Punch
- Set the start and end date
- Write the scope description — what actually gets done in this phase
- Click Save Scope Entry
Phases belong to the project, not to a person. You staff the work on the schedule, and you assign individual punch items to people.
Phases show as Upcoming, In Progress, or Completed. The active phase is highlighted so you can see where the job is at a glance.
Phases can be edited or deleted at any time, so add them as the job takes shape rather than trying to plan the whole install up front.
Add equipment to the work order
- Click + Add Equipment and pick from the dropdown
- Or choose + Add manually for a one-off
The dropdown pulls from the assets set up under Settings › Company › Assets — the same list you book on the schedule. See Managing Assets & Equipment.
Generate the work order
Click Generate Work Order PDF on the Work Order tab. It pulls the jobsite address, contacts, equipment, and scope phases into one document you can hand to the crew.
The PDF only shows work that's still outstanding. Mark a scope phase Completed and it drops off the next PDF. Punch items do the same once they're resolved.
Keep daily logs
Each log is tied to a scope of work phase and records what happened that day.
- Click + Daily Log
- Pick the phase it belongs to
- Write what got done and attach photos
A log shows the phase and its dates, the notes, and the jobsite photos. You can edit or delete a log after it's saved.
Keep the job's paperwork together
Everything for the job lives here — drawings, the signed contract, permits, manufacturer specs, site photos.
- Click + Upload File to add files from your computer
- Or pull them in from Google Drive if you've connected it under Integrations
Filter the list by Images, Videos, or Documents when you're hunting for one thing, and search by name.
Files live on the project, not on the company, so each job carries its own paperwork.
Close a phase
When the work in a phase is done, close it out one of two ways:
- Complete — the phase is finished clean
- Punch — the phase is done except for items that need to come back
Choosing Punch opens the punch list for that phase. See Punch List Management.
Keep the customer posted
Click Notify Customer to send a project update. This opens your own email program with the update ready to go, the same way sending a quote does.
Every notification is recorded in the Customer Notification Journal on the Product Tracker tab, covering both project updates and product receiving.
Hand the job off for final invoicing
Mark Project Complete on the Work Order tab is how the field side tells the office a job is done and ready to bill.
- Click Mark Project Complete
- Add any invoicing notes — extras, back charges, anything that affects the final bill
- Hit Submit
An email goes to everyone whose role has receive project emails ticked. They handle the final invoicing and check for anything outstanding.
The project moves to Projects › Completed, where it stays permanently. Nothing is deleted or archived away — you can open a finished job years later.
Punch List Management
How punch works here
Every punch item is attached to a scope of work phase. When a phase is done except for a few things, you close it as Punch instead of Complete. The phase stays visible with its open items listed underneath and a badge showing the count.
The job isn't clean until those items are resolved.
Add a punch item
You can also add one from the Daily Logs tab on the phase the crew is working.
Click + Add Punch Item. Each one holds:
- Title — the short version
- Description — what's wrong
- Priority — High, Medium, or Low
- Status — Open or Completed
- Assigned to — the team member who owns it
- Notes — the detail, plus photo and document uploads
See what's open
On the Work Order tab, any phase with punch items shows a punch badge with the count, and the items list underneath the phase. Each item shows as Open until it's cleared.
Clear an item
- Set the item's status to Completed, or click Resolve next to it
Completed items drop off the work order PDF, so the crew's printout stays a list of what's left.
Once every item on a phase is completed, the phase can close out.
Punch and closeout
Punch lives on the job it came from, which is what keeps it tied to the phase, the crew, and the photos.
Before you mark a project complete, work back through its phases and confirm nothing is still Open. Open punch is the most common reason a final invoice sits unpaid.
Logging a Receiving Entry (BOL)
Start the entry
- Click + New Receiving Entry
Fill in the header
- BOL Number
- PO Number — ties the delivery to what you ordered
- Supplier
- Date Received
- Date Delivered — leave blank until it goes to the jobsite
- Notes — optional
Days in Storage fills in on its own from the date received, and stops counting the day you enter a date delivered.
Enter the line items
One row per item on the BOL:
- Item Description
- Qty
- Unit — EA, LF, and so on
- Weight
- Status — Complete, Short, Damaged, or Pending
Click + Add Line Item for each additional row.
Attach the paperwork and photos
- Upload BOL Document — the signed PDF
- Upload Delivery Photos — JPG or PNG, as many as you need
Photograph damage before anything moves off the truck. That's your claim.
Save it
Click Save Receiving Entry. It appears in the Product Tracker table, where you can expand it to see line items, edit it, or mark it delivered later. See Tracking Product from PO to Delivery.
Tracking Product from PO to Delivery
Read the tracker
Every project has a Product Tracker, whether or not there's a PO against it.
One row per receiving entry. The columns tell you the whole story:
- BOL / Entry and PO Number
- Supplier, Items, Weight
- Date Received and Days in Storage
- Date Delivered
- Status
Click the arrow on any row to expand it and see the individual line items with their own status.
What the statuses mean
- Expected — ordered, not here yet
- Received — it's in your possession
- Delivered — it's gone out to the jobsite
Line items inside an entry carry their own status: Complete, Short, Damaged, or Pending. A BOL can be received while three pieces of it are still short.
Watch the storage clock
Days in Storage starts the day you receive and keeps counting until you enter a delivery date. Entries sitting too long get flagged so they stand out in the list.
Two reasons to care: warehouse space you're not being paid for, and storage you're entitled to bill and forgot to.
Mark it delivered
- Click + Deliver on the row when product goes to the site
That stamps the delivery date, stops the storage counter, and flips the status to Delivered.
Fix an entry
- View opens the full entry, including attached documents and photos
- Edit lets you change anything — every field stays editable after saving
Tell the customer what landed
Click Notify Customer to send a product update. You get a templated email you can edit before it goes, and it attaches the documents on that receiving entry — the BOL and any delivery photos.
Underneath, the Customer Notification Journal keeps a record of every notification sent on the job — product received and project updates both. You can see how many times a customer has been told something, and when.
That journal is your answer when someone says they were never told. When product is late from the manufacturer, a logged note is the difference between their problem and yours.
Scheduling Your Crew for the Week
Where to look
Under Calendar there are two views, and they answer different questions:
- Schedules — the week grid. Who's working, which days, plus your assets. This is where you build the week.
- Projects — a month calendar showing every project scheduled that month at a high level. This is where you see how busy or slow you are.
There's also a Schedule tab inside each project for staffing that one job.
Move through the weeks
The date range sits at the top with arrows either side. Click through to the week you're building.
Add a shift
- Click + Add Shift
- Pick the employee or contractor
- Pick the day and set the start and end time
The shift lands in that person's row on that day. Someone can have more than one block in a day if they're splitting between jobs.
Read the grid
- Each row is a person, each column a day
- A time block means they're scheduled
- An empty box means they're open
- Partial-day shifts show with their own times
Empty boxes are the point. That's where you find the capacity you didn't know you had.
Schedule your assets too
Below your people, the same grid has an Assets section for trucks and shared equipment. See Managing Assets & Equipment.
Getting it to the crew
Field users see their own schedule in the mobile app, and they get a notification when they're scheduled or when a shift changes. Nobody has to remember to check.
Managing Assets & Equipment
Assets vs. equipment
- Assets are the things you schedule — trucks, trailers, lifts, the shared tools you only own one or two of
- Equipment on a work order is the list of what this job needs on site
Same gear, two questions. Assets answer "is it free Thursday." Equipment answers "what's going on the truck."
Schedule an asset
Assets sit in their own section below your people on the same week grid. Book them the same way — + Add Shift, pick the asset, pick the day and times.
You can't double-book an asset. Once it's booked, it shows as unavailable on the schedule, so nobody can put the same truck on two jobs at the same time.
Add equipment to a job
- Click + Add Equipment
- Choose from your saved list, or pick + Add manually to type a one-off
- Remove a row with the ✕
Whatever's listed here prints on the work order PDF, so the crew knows what should be on the truck before they leave the shop.
Build your asset list
This is where you create the trucks, tools, and equipment your company owns. Everything you add here becomes an option in the dropdowns your team picks from — on the schedule and on a project's equipment list.
- Add each asset once, named the way your crew refers to it
How to Use With QuickBooks
Connect first
Set up the connection under Integrations before you invoice anything. Your companies, products, services, and tax rates come across, so invoices land in QuickBooks already coded correctly.
Invoice from the project
Build and send the invoice here, not in QuickBooks. Fieldworks Pro is where the job data lives — the contract value, what's been billed, what's left. Invoicing from the project keeps those numbers honest.
Full steps in Sending Invoices.
What lands in QuickBooks
- The invoice, against the matching customer
- The line items, mapped to your QuickBooks products and services
- The tax, using your QuickBooks rates
The invoice also sends from QuickBooks, not from Fieldworks Pro.
Recording payment
Payments get received in QuickBooks the way your bookkeeper already does it. When an invoice is marked paid in QuickBooks, that syncs back to Fieldworks Pro on its own.
Nobody has to update the status in two places, and your project's Remaining to Invoice reflects what's actually been collected.
The one rule
How to Use Without Syncing to QuickBooks
Set up what the sync would have brought
- Products and services — the line items you bill
- Tax rates — if you tax your work
- Branding — logo, remit-to details, and the header and footer on every invoice
Invoice the same way
Deposit, single, and partial invoicing all work the same with or without the sync. See Sending Invoices.
Record payments yourself
With no sync, nothing tells Fieldworks Pro when a check clears. You mark the invoice paid so the project reflects what's been collected.
- Open the invoice and update its status when payment comes in
Getting numbers to your accountant
Your invoice history lives on each project's Finance tab, and PDFs are available on every invoice.
Connecting later
You can connect QuickBooks any time. Before you do, read the name-matching section in Managing Contacts When Synced to QuickBooks — matching your company names first is what keeps you from ending up with two of everything.
Sending Invoices (Deposit, Progress, Final)
Where invoicing lives
Across the top you get the numbers that matter:
- Contract Value — what you sold
- Amount Invoiced — what you've billed so far
- Remaining to Invoice — what's still on the table
- Estimated Cost and Projected Profit
Remaining to Invoice is the one to watch. If a job is finished and that number isn't zero, you haven't finished billing it.
Pick your invoice type
Click Add Invoice and choose:
- Deposit Invoicing — money up front before you order or schedule
- Single Project Invoicing — the whole job on one invoice
- Partial Project Invoicing — a progress billing against part of the work
How partial invoicing works
Partial invoicing is line by line, which is what makes progress billing on a phased install straightforward.
- Pick the line item you're billing
- Enter a percentage of that line, or type a dollar amount
- Repeat for each line you're billing this round
So you can bill 100% of delivery and staging, 50% of install labor, and nothing on the punch line, all on one invoice.
Build and send it
- Set the amount or pick the lines you're billing
- Set the due date
- Save it as a Draft, then click Send when you're ready
Drafts sit in the invoice table until sent, so you can build the final invoice while the job is still finishing.
Where the invoice actually goes out from depends on whether you sync:
- Not synced to QuickBooks — Send opens your own email program, the same way quotes do
- Synced to QuickBooks — the invoice sends from QuickBooks
Track what's out there
The invoice table lists every invoice on the job — number, type, date sent, due date, amount, and status.
- Draft — built, not sent
- Sent — out and waiting
- Partially Paid — some of it has come in
- Paid — closed
The footer totals it up: how many invoices, how much received, how much outstanding.
View, PDF, resend
- View opens the invoice
- PDF gives you a copy to attach or file
- Resend sends it again when someone says it never arrived
You can also edit an invoice after it's been sent and resend it from Fieldworks Pro. A wrong amount or a missing PO number is a fix, not a credit note.
Bill the final
Before you send the final invoice, check two things: the punch list is clear, and Remaining to Invoice matches what you're about to bill. Open punch items are the most common reason a final invoice sits unpaid for sixty days.
About the Mobile App
Who the app is for
Everyone you add is either a desktop user (office) or a field user (mobile app). Installers, helpers, crew leaders, and subs are field users.
Get the app
Fieldworks Pro is on the Apple App Store and Google Play. Have your crew search for it and install it on their own phones — you don't need to buy hardware for this.
Get your crew signed in
Crew members don't sign themselves up. Your super admin adds each person to the account, one at a time.
- Add the person under Employee / Contractor
- Give them a role
- They sign in on the app with the credentials set up for them
What they can see and do comes from their role, so an installer isn't looking at your margins.
What crews do on it
- Clock in and out against a project — see Clocking In / Out
- See their schedule — where they're going and when, with a notification when it changes
- See the job — the work order, if their role allows it
By default a field user only sees the projects they're scheduled on. That keeps their phone showing today's work and nothing else.
On the employee's profile you can turn on the ability to see the whole schedule. Those people can then see other projects too.
Everything they enter lands on the project the office is already looking at. Nobody re-keys anything.
Signal on the jobsite
The app works with no signal. Your crew can keep clocking in, filling in logs, and taking photos in a basement, a freight elevator, or a building with no service.
It just has to get on a connection at some point to sync back to Fieldworks Pro. Until it does, the office won't see what was entered.
Clocking In / Out
Open the app
Signing in shows the crew member their schedule — the shifts the office built on desktop. They can see where they're going without calling anyone.
Pick the project
- Select the project from the dropdown
- Clock in
They clock into the project, and that's all they pick. There's no phase to choose — the scope of work belongs to the job and drives the crew's work order, not each person's day.
The dropdown shows the projects that person is scheduled on. If someone regularly gets moved between jobs mid-morning, turn on full schedule visibility for them on their employee profile so every project is available to pick.
Clock out
At the end of the day, clock out. The hours between are logged against the project they picked.
Moving between jobs in a day
Split days are normal in installation work — a punch walk in the morning, a delivery in the afternoon.
- Clock out of the first project
- Select the next project from the dropdown
- Clock in again
Two clean entries beat one long day charged to whichever job they happened to start on.
What to tell a new crew member
Three rules cover it:
- Clock in when you get to the site, not when you leave the shop — unless that's your policy, and then say so
- Check the project name before you clock in
- Clock out before you leave
Crews follow a rule they understand. If hours are landing on the wrong jobs, it's usually because nobody told them the dropdown mattered.
Fixing a bad entry
Bad entries happen. The process has two halves.
In the field: the crew member leaves a note on the entry. Someone who forgot to clock out at five and caught it at six writes "forgot to clock out at 5." They don't need to fix it themselves, they just need to flag it.
In the office: anyone with desktop access opens Time Sheets and corrects the time.
Time Tracking from the Field
Where the hours come from
Every hour starts as a crew member clocking in against a project on the mobile app. See Clocking In / Out.
There's no separate step where someone enters time later. The clock-in is the record.
Why the project matters
Hours tied to a project become two things at once:
- Payroll — what you owe the person
- Job cost — what the job cost you in labor
A timesheet only gives you the first. That's the difference between knowing your payroll number and knowing whether you made money on the Sagicor install.
Where the office sees it
Hours land here as crews clock in and out, and feed the reports:
- Payroll Report — hours by employee for the pay period
- Overtime Report — hours over your threshold
- Labor Costing Report — what labor cost by job
The Dashboard has a Who's Working panel listing everyone actively clocked in right now, and the project they're on.
Check it during the week, not after
Look at Time Sheets midweek and you can still fix things while people remember the day. Look at it the morning payroll is due and you're guessing.
What to look for:
- Someone scheduled but showing no hours
- A shift much longer than a workday
- Hours on a project nobody was assigned to
- Notes from the crew flagging an entry that needs correcting
Anyone with desktop access can correct a time in Time Sheets. Do it before payroll, not after.
Getting it to stick
The system only works if the crew uses it, and crews use what's simple and consistent.
- Set one rule for when the day starts and repeat it
- Make the crew leader responsible for their crew clocking in
- When hours look wrong, ask the same week, not at payroll
Time Sheets
Where the hours come from
Everything here comes from crews clocking in and out against a project on the mobile app. See Clocking In / Out.
Filter by employee to work through one person at a time. That's the fastest way to run a pay period — take each person in turn rather than scanning one long list.
Read the crew's notes first
Field users can leave a note on their own entries. Someone who forgot to clock out at five and caught it at six writes "forgot to clock out at 5."
They're flagging it for you, not fixing it. Read the notes before you start correcting times — they tell you what actually happened.
Correct an entry
Anyone with desktop access can edit a time entry. Open it, fix the time, save.
What to look for:
- A shift far longer than a workday — usually a missed clock-out
- Someone scheduled with no hours at all
- Hours on a project that person wasn't on
Add an entry from scratch
You can add a time entry outright, not just correct one. Use it when someone's phone died, when a sub worked without the app, or when a whole day never got clocked.
The form asks for what's needed to build the entry:
- Project
- Start time and end time
- Break, if they took one
Then run your reports
Order matters. Correct Time Sheets first, then run:
- Payroll Report — hours by person
- Overtime Report — hours over your threshold
- Summary Report — what each person gets paid
Every one of those reads from these entries. Run them first and you'll just be running them again.
Make it a habit
Check Time Sheets midweek, not the morning payroll is due. Midweek you can ask someone what happened on Tuesday and get a real answer. On payroll morning you're guessing, and guessing is how hours land on the wrong job.
Payroll Report
Run it
- Set the date range to your pay period
- Run the report
What it shows
Hours by person for the period you picked, built from what they clocked on the mobile app. Regular hours and overtime hours are split out, with a total.
So a line reads like: Mary — 22 regular hours, 3 overtime hours.
Check it before you pay it
Look for the things that mean somebody forgot their phone, not that they worked a strange week:
- A day with no hours for someone who was scheduled
- A shift far longer than the workday — usually a missed clock-out
- Hours on a job nobody was supposed to be on
Your crew leaves notes on the entries themselves — "forgot to clock out at 5" — so read those first, then correct the times in Time Sheets before you run payroll.
Fixing those before payroll runs is a five-minute job. Fixing them after is a correction and an awkward conversation.
Get it out
Export it or print it, then hand it to whoever runs your payroll.
Overtime Report
Set your overtime rule first
You choose how overtime is counted:
- Over 8 hours in a day
- Or over 40 hours in a week
Check the box for the rule you run on, then Save Changes. The report follows that setting, and so does the Summary Report when it calculates pay. Get it right before you rely on either.
Run it
- Set the date range
- Run the report
What it shows
Overtime hours by employee for the period.
What to do with it
Overtime on an installation crew usually traces back to one of three things:
- A job that was underbid on hours
- Product that landed late and compressed the install window
- A crew short a person
Cross-check heavy weeks against the Labor Costing Report. If the overtime is stacking on one job, that job's estimate was wrong — and the next one like it will be too unless you change how you price it.
Labor Costing Report
Two places to look
- Reports › Labor costing report — across the business
- A project's Reporting tab — just that job
Use the project view while a job is running. Use the Reports view when you're deciding how to price the next one.
Run it
- Set the date range
- Filter by project or employee to narrow it down
Cost entries on a project
A cost entry is a real cost you incurred on the job — materials you had to buy, fuel, anything that came out of your pocket to get the work done.
You add them the same way you'd add a line to a quote, picking from the products and services your admin set up in Fieldworks Pro or synced from QuickBooks.
- Click + Add Cost Entry and pick the item
- The Cost Catalog holds your standard costs so you're not retyping them
Reading it honestly
Compare actual labor cost to what you estimated on the job. Then ask what kind of job it was.
One job over on hours is noise. The same type of job over every time is a pricing problem. Installation work goes wrong in patterns — a particular manufacturer's product, a particular building, a particular kind of customer — and this report is where the pattern shows up.
Summary Report
Summary vs. Payroll report
They're close cousins, and the difference matters:
- Payroll Report — hours only. "Mary worked 22 regular hours and 3 overtime hours."
- Summary Report — dollars. "John gets paid $5,000. Susie gets paid $2,200."
Run Payroll when you want to check the hours. Run Summary when you want the math already done.
Set up the two things it depends on
The Summary Report is only as right as these:
- Each person's pay rate, on their Employee / Contractor record
- Your overtime rule, under Settings › Finance › Payroll › Overtime — 8 hours a day or 40 a week
Run it
- Set the date range to your pay period
- Run the report
It pulls the clocked hours, multiplies by each person's rate, applies overtime per your setting, and returns a pay amount per person.
Check the hours first
Correct your Time Sheets before you run this. The report does the arithmetic faithfully, including on a shift somebody forgot to clock out of. Bad hours in, confident wrong number out.
Export or print it
Send it to whoever cuts the checks.
Frequently Asked Questions
Account & Users
How do my crew members get an account?
They don't sign themselves up. Your super admin adds each person under Employee / Contractor and assigns them a role. See Employee / Contractor.
How many users do I get?
Desktop users are capped by your plan. Field app users are unlimited on Growth and Enterprise, so you can add every installer, helper, and sub without paying more.
Someone left. Do I delete them?
Deactivate them. Their record and history stay, and they lose access — which keeps last year's labor numbers accurate. If you need the desktop seat back for a replacement, deleting the employee frees it up.
Why can't I tick Desktop access for someone?
You're out of desktop seats on your current plan. Free one up or move up a tier.
Can I change a role's permissions later?
Yes. Edit the role and the change applies immediately to everyone assigned to it. You don't need to create a new one.
Mobile App
Where do I get the mobile app?
The Apple App Store and Google Play. Your crew installs it on their own phones — you don't need to buy hardware.
Does the app work with no signal?
Yes. Crews can keep working in a basement or a building with no service. The app has to get on a connection at some point to sync back, and until it does the office won't see those entries.
My crew leader can't find a job in the clock-in dropdown.
The dropdown shows the projects that person is scheduled on. Turn on see the full schedule on their employee record and every project becomes available. Worth doing for anyone who gets moved between sites.
Who writes the daily logs?
The office, from the desktop. Get your crew leaders sending you the day's notes and photos, and log them against the phase they belong to. See Managing an Active Project.
Do crews get told when their schedule changes?
Yes. Field users get a notification when they're scheduled and when a shift changes.
Time & Payroll
Someone forgot to clock out. How do I fix it?
The crew member leaves a note on the entry — "forgot to clock out at 5." Anyone with desktop access then corrects the time in Time Sheets. Do it before you run payroll.
Can I add time for someone who never clocked in?
Yes. You can add a time entry from scratch in Time Sheets — project, start time, end time, and a break if they took one.
How is overtime calculated?
However you set it. Under Settings › Finance › Payroll › Overtime, choose over 8 hours in a day or over 40 in a week.
Which report do I use for payroll?
Depends what you want. Payroll Report gives hours only, for W-2 and 1099 people. Summary Report does the math and gives you dollar amounts per person.
Someone's pay is blank or wrong on the Summary Report.
Almost always a missing pay rate on their Employee / Contractor record. The report multiplies hours by that rate, so with nothing there it has nothing to work with.
Can I export or print reports?
Yes, all of them.
Quotes
Can I type a line on a quote that isn't in my products and services?
No, and it's deliberate. Quoting something outside your product list causes syncing problems with QuickBooks later. Add the item to your products and services first, then quote it.
Can I reuse a quote for a similar job?
Yes. Duplicate an existing quote, or create a new version of one when a customer asks for changes.
What are the quote statuses?
Working, Sent, Won, Lost, and Expired.
I clicked Open in Email and the wrong program opened.
It opens whatever your computer has set as its default mail program. If you use Gmail in a browser or as a Chrome app, that won't be Gmail. Change your computer's default mail program.
How do I turn a won quote into a project?
Open the quote and click Convert to Project. One button. The company, contacts, and line items all carry over.
What is the Estimator?
A way to price a quote in your own connected Google Sheets spreadsheet instead of building line items by hand. Click Add Estimator on a quote and Fieldworks Pro creates a fresh copy of your linked template just for that quote. See Using the Estimator.
If I update my Estimator template, does it change quotes I already sent?
No. Editing your master template in Google Drive only affects estimators you create after the change. Workbooks already created for other quotes stay exactly as they were.
Projects
Can I create a project without quoting it first?
Yes — + Add new then Project. One catch: a project made this way can't be linked to a quote afterward, so you lose the quoted-versus-actual comparison on that job.
What's the difference between a stage and a flag?
A stage is where the job sits in your process — every project is in exactly one. A flag is something true about it right now, like Deposit Required, and a project can carry several at once.
Where do I set a project's status?
There isn't a separate status field. Stages are the status. Beyond that a project is Active or Completed, which is how they're split under Projects in the menu.
Where does the jobsite address go?
On the project. It isn't collected at the quoting stage, so you type it in after converting. A company's address is its billing and shipping address, not the jobsite.
What does Mark Project Complete actually do?
It hands the job to the office for final invoicing. You add invoicing notes, hit submit, and an email goes to everyone whose role has receive project emails ticked. It does not check for open punch items or an unbilled balance, so check those yourself first.
Nobody received the project complete email.
No role has receive project emails ticked. Set it on whichever role does your billing.
Where do finished projects go?
Projects › Completed, permanently. Nothing is deleted, so you can open a job from years ago.
How should I stay on top of punch items?
Punch lives on the job it came from, tied to the phase, the crew, and the photos. Make it a standing weekly check — open each active project and clear its list on the same day each week. Ten minutes on a Friday keeps final invoices moving.
Scheduling
Can I double-book a truck by accident?
No. Once an asset is booked it shows as unavailable, so it can't be promised to two jobs at once.
Where do trucks and equipment come from?
Settings › Company › Assets. Everything you add there appears in the dropdowns on the schedule and on a project's equipment list.
What's the difference between Calendar › Schedules and Calendar › Projects?
Schedules is the week grid where you build the week. Projects is a month view showing everything scheduled that month, so you can see how busy or slow you are.
Does the schedule sync to Google Calendar?
No. Scheduling lives in Fieldworks Pro and your crew gets it in the mobile app. The Google connection is for Drive files.
Invoicing & QuickBooks
Do I have to use QuickBooks?
No. Fieldworks Pro will run your invoicing on its own — you just set up your products, services, and tax rates yourself instead of importing them.
My invoice footer isn't showing on invoices customers receive.
If you sync with QuickBooks, invoices send from QuickBooks using its template, so your Fieldworks Pro header and footer don't appear. Put your terms and remit-to details in QuickBooks. Your branding still applies to quotes.
I have two records for the same company.
The sync matches on name, so "Acme Interiors, Inc." and "Acme Interiors" become two records. Move the quotes and projects onto the one you're keeping, then delete the other.
Does payment status come back from QuickBooks?
Yes. Mark an invoice paid in QuickBooks and it syncs back automatically.
Can I edit an invoice after sending it?
Yes, and you can resend it from Fieldworks Pro.
How do I bill part of a job?
Use Partial Project Invoicing. Pick the line item, then enter a percentage of that line or a dollar amount. You can bill different amounts on different lines on the same invoice.
Product & Receiving
Where do I log a delivery?
The Product Tracker tab on the project, using + New Receiving Entry. Every project has one, whether or not there's a PO against it.
What is Days in Storage?
It starts counting the day you receive product and stops the day you enter a delivery date. Useful for billing storage, and for spotting what's been sitting in your warehouse too long.
Product arrived short or damaged. What do I do?
Mark the line item Short or Damaged at the dock and note the count in the description. Photograph damage before anything comes off the truck — that's your freight claim.
Data & Setup
Can I import my existing customer list?
Yes — Settings › System › Data Import, using CSV or Excel. You can import companies and contacts. Do companies first, since contacts attach to them.
Can I delete a company?
Yes, and its quotes and projects aren't deleted with it — they stay and show "company deleted" next to them. Move anything live onto the record you're keeping first.
Where do I set my revenue goals?
Settings › System › Dashboard. Set a quoting goal and a booked goal, and the Dashboard tracks progress against both.
Anything Else
Can I request a feature?
Yes, please do. Email us with what you need and why, and we'll take a look. Fieldworks Pro is built for furniture installation companies, so requests from people doing the work are how it gets better.
Something isn't working the way this help center describes.
Let us know. Tell us what you were doing, what you expected, and what happened instead.